Iris Booth Logo
Iris Booth Logo
Welcome to Iris

This is your guide to a headshot you'll be proud to use.

Capturing great headshots is what we do — it's all we do. So if you'd like a few pointers before you step in, here's what decades behind the camera have taught us. None of it's required, but it helps.

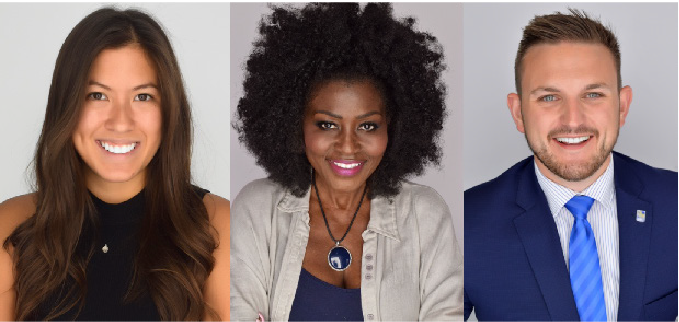
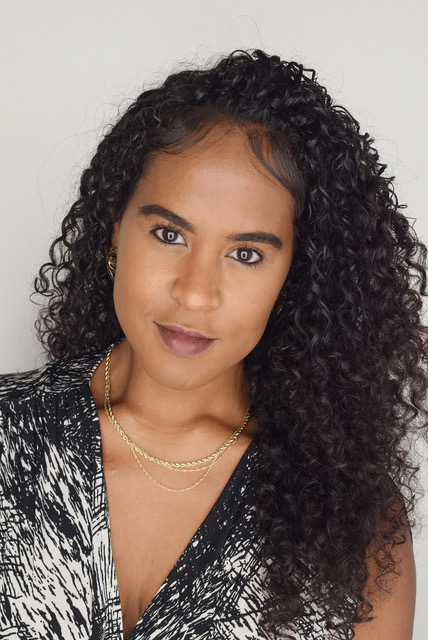
A natural, confident headshot captured in the Iris Booth

You don't need to be photogenic, or practised, or even sure what to do with your hands. You just need a few minutes and a couple of small pointers — the same ones we'd give you in person if we were standing beside the booth. We've got you, and you've got this.

Before you arrive

A few practical things.

None of it is required, but a little prep goes a long way. Sort these ahead of time and you'll step in feeling confident.

Only your head and shoulders are in frame — wear whatever's comfy below (even sweatpants!).
Solid colours photograph best — skip pure white so you don't blend into the background.
Patterns are welcome — just skip big logos or anything too busy.
Use a lint roller to quickly refresh your shirt.
Bring lip balm to moisturize your lips.
Glasses are welcome — you can remove the reflection with our glare removal feature!
Before you sit down

Take a beat before you step in.

Two quick things before you sit down — 30 seconds in the mirror and a slow breath. Then step in and just focus on the photo.

Taking a quick look in the mirror before stepping into the booth

Give yourself 30 seconds in the mirror.

Before you step in, take a quick look and catch the small details you care about — a flyaway, a stray hair, a collar that's tucked under, or a necklace that needs centering. Then you can forget about it and just focus on the photo.

Taking a slow breath and letting the shoulders drop before the first photo

Take one slow breath.

Nerves sit in your shoulders, and the camera catches it. Before you sit down, take one slow exhale and let your shoulders drop — your whole face softens with it.

When you arrive at the booth

Five tips that make a big difference.

Feel at ease and comfortable during your self-serve photo session.

A relaxed first photo inside the booth, settling in before the keepers
Tip 01

Treat your first photo like a practice shot.

Your first go is really just a warm-up. You get a retake on your photo, and you can run as many sessions as you'd like — so let the first one be a throwaway. Use it to find your feet: settle into the chair, see the lighting, shake the nerves out. Once that one's done, the pressure's gone and the good ones come easy.

Turning slightly on the chair to find a natural angle
Tip 02

Spin your chair. Don't square up to the camera.

Facing the lens dead-on is what turns a photo into an ID card. You're on a swivel chair for a reason — turn your shoulders a little and drop the shoulder closest to the camera. That small angle is the whole difference between a passport photo and a portrait.

Looking directly into the camera lens
Tip 03

Look directly into the camera lens.

Find the camera, not the screen. Eye contact is what makes a headshot feel like it's connecting with someone instead of just looking near them.

A natural, relaxed smile arriving as the photo is taken
Tip 04

Smile on the last beat of the countdown.

Hold a smile through the whole countdown and it freezes — you can see the effort in it. So wait. Let the smile land right as the photo fires and it stays real, and a real smile shows up in your eyes, not just your mouth.

Bringing the chin down and slightly forward to define the jawline
Tip 05

Chin down, and a touch forward.

This is the one thing a photographer adjusts for almost everyone. Bring your forehead a little toward the lens and drop your chin slightly. It defines your jaw and keeps the camera from looking up at you. It feels strange. It looks great. Trust it.

What happens inside

Start to finish, about three minutes.

No photographer, no pressure. The booth walks you through every step — here's the whole thing before you even step in.

1

Log in

Step in and sign in with your email. That's the whole setup.

2

Quick tutorial

Iris walks you through posing before you start, so there's no guessing once the camera's on.

3

Take a few

Snap your photo and grab a retake if you want it. Not happy? Start a fresh session — as many times as you like.

4

Make it yours

Simple editing tools let you polish your favourite until it feels right.

5

Download

Your headshot is emailed instantly, and it's yours to keep and share.

Good to know

Before you step in.

Totally normal. Treat your first photo as a practice shot — you can retake your shot and run as many sessions as you like, so there's no pressure to get it right cold. Most people relax by the second or third try.
Retake it, or run the session again — you can do that as many times as you like, and only leave with the one you love. Nothing is final until you say so.
About three minutes from start to finish.
Yes. Taking them off is the easy way to avoid any glare, but you don't have to choose between your glasses and a clean shot — Iris has built-in glare removal. If your glasses are part of who you are, keep them on and we'll handle the reflection.
Nope. Come as you are. Lip balm and a quick pass with a lint roller are nice-to-haves, not requirements.
Whatever makes you feel confident. Solid colours photograph cleanly and pure white tends to blend into the background, but the real rule is to wear what feels most like you.
Nothing special. The booth lighting is bright, so makeup reads a touch stronger than usual — if you wear it, go a hair lighter than you normally would. A quick tidy of hair or facial hair photographs cleaner, but none of it is required. Come as you are.

That's everything. Now go have fun.

Step in, be yourself, and let the camera do the rest.

Iris Booth Logo
Join the growing number of organizations that have discovered a better, more efficient way to capture professional portraits—without the headaches.
© 2025 Iris Booth. All rights reserved.
Site Designed by Giant Shoe Creative.